What is Spot UV?
Technically, spot UV is not a printing process but a finishing process. A layer of clear polymer is applied to the stock over selected areas and then cured under a UV light to achieve a glossy seal. As well as creating a unique visual effect, a spot UV coating makes the print interesting to touch, too! You’ll often find people running their fingers over the spot UV elements of a design to feel the embossed, polished texture.
The name ‘spot UV’ comes from the fact that it is applied much like a spot colour and that is why you must be careful when setting up your artwork. Spot colours are premixed inks that cannot be sent to print like normal because the printer will attempt to create that colour using its CMYK inks. Instead, these colours must be applied unmixed and only to the specific areas of the design where the colour is present.
Just like with spot colours, spot UV artwork must signal to the printer that certain elements of the design are not created using the CMYK inks. Our studio team will do a lot of this for you but, in order to let them know what you want, there are a few things you need to do for us first.
How to Create and Submit Your Artwork
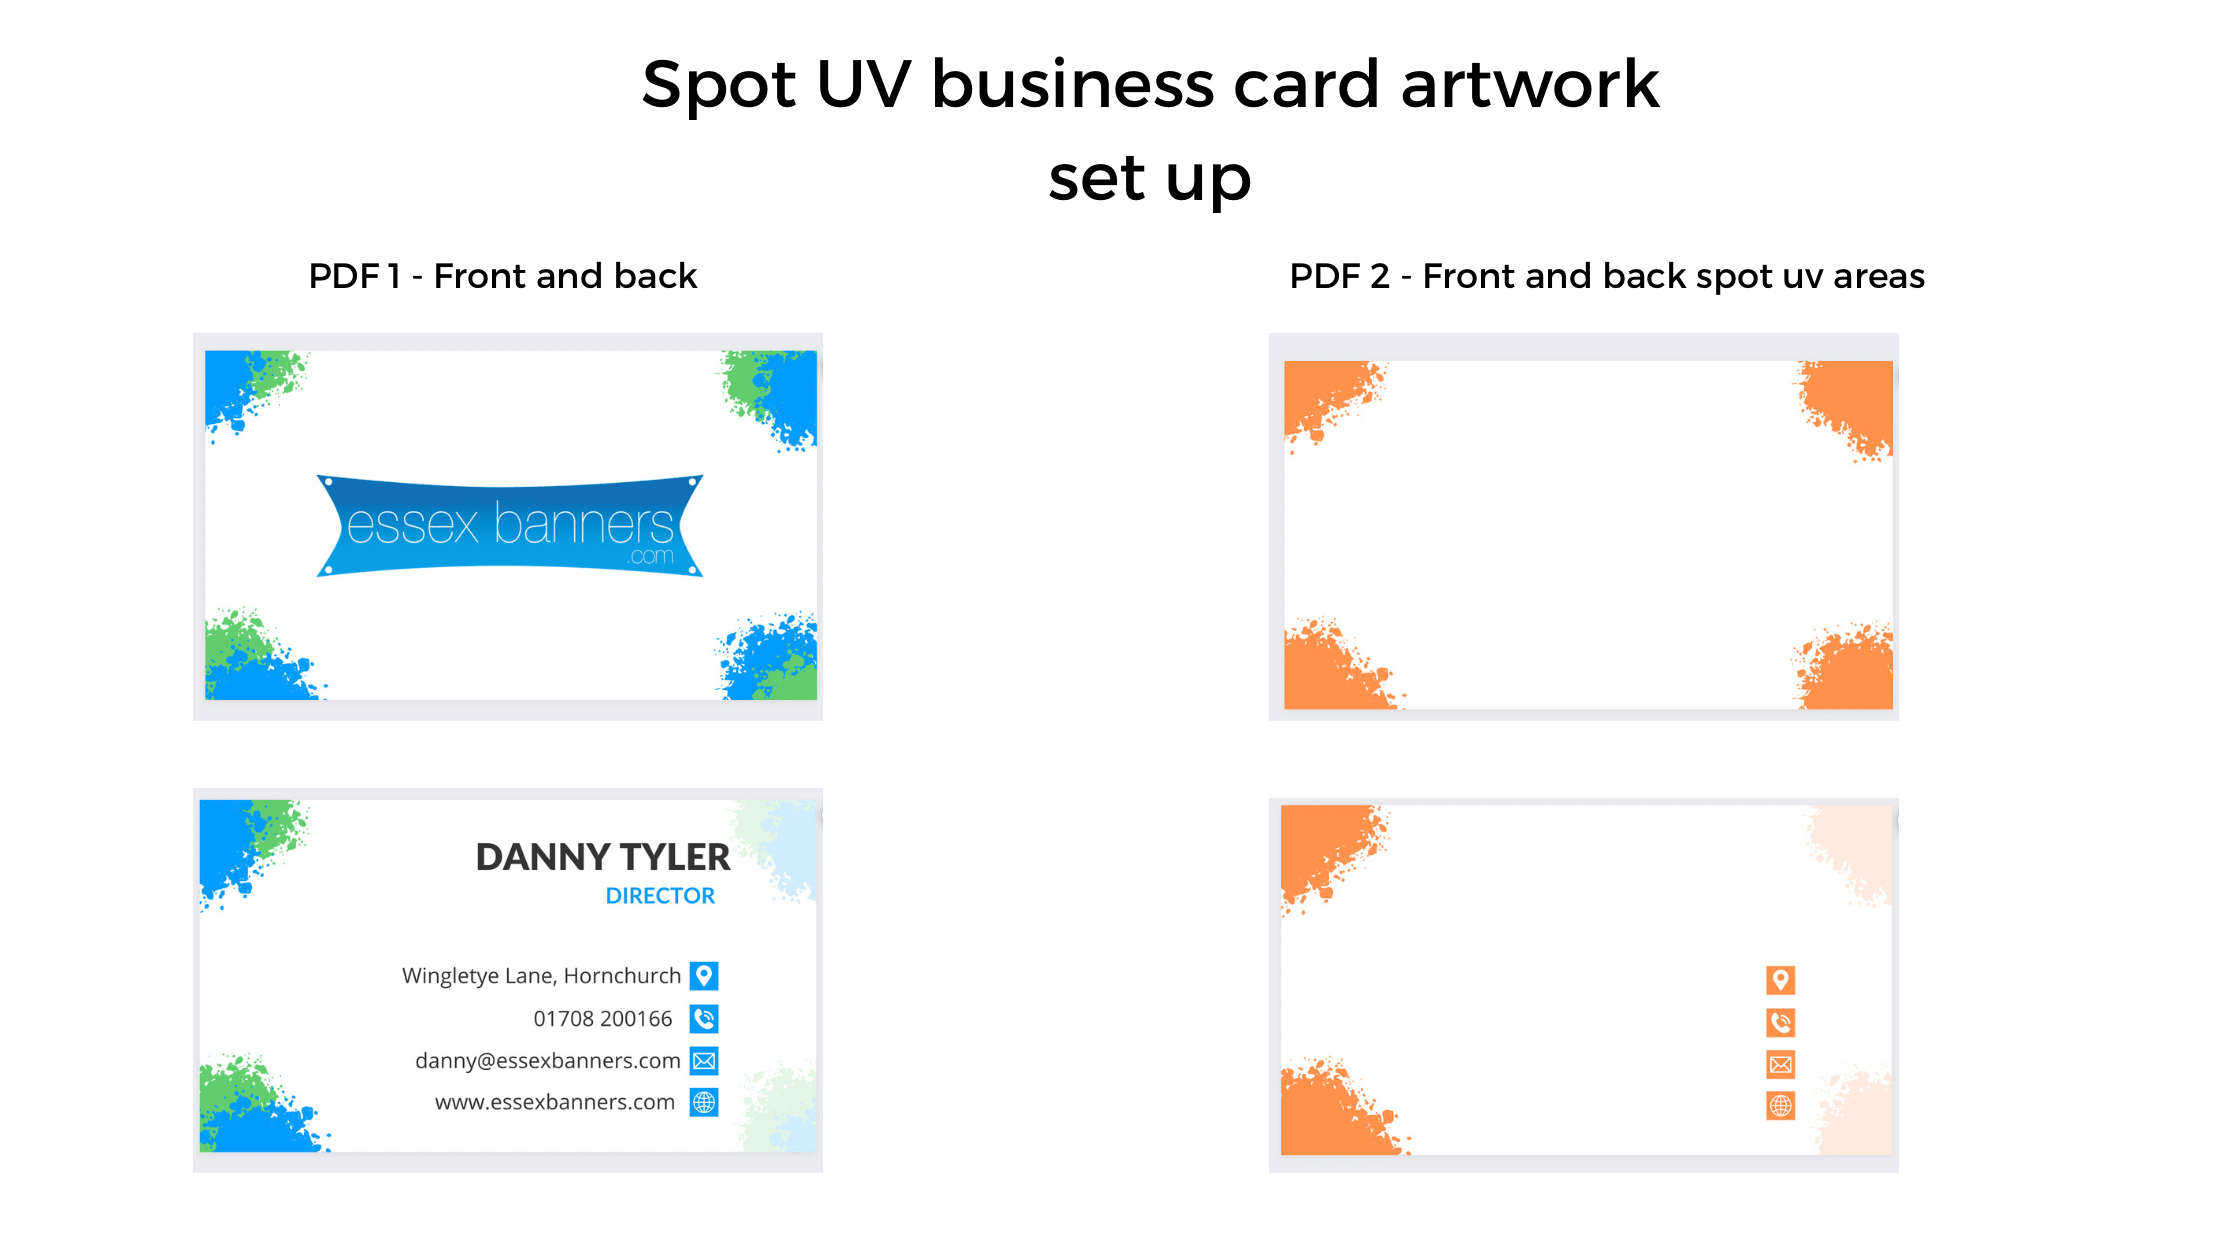
To keep things simple, we’d like two separate PDFs from you for each printed page; one for your general artwork and another for your spot UV design elements. Doing this means that our studio team know exactly what you do and don’t want in spot UV.
See the attached image. PDF 1 is the business card actual artwork and PDF 2 with the orange areas are the areas that intent to be spot UV, this way we know what areas are being printed in spot UV
Setting Up Your Artwork
Like we mentioned earlier, our studio team will take care of the more complicated aspects of sending your artwork to print. First though, you need to make sure that your spot UV elements are perfectly aligned with the rest of your artwork.
- Create your design as normal and save it as your general artwork PDF.
- Duplicate your design and delete any elements you do NOT want spot UV on.
- Recolour the remaining elements with a solid fill colour – use the same colour for everything you want spot UV applied to.
- Create any additional spot UV elements that don’t depend on the design beneath (use the same fill colour from before).
- Make sure to include “SpotUV” at the end of the file name when you save.
Please note, we recommend leaving a 5mm safety zone from the trim line for all spot UV elements.
For spot UV jobs, you need to upload two files for each printed page that you’re having spot UV on. For example, if you ordered a double sided flyer with spot UV on the front and back, you’d need to upload four files. One file for the front artwork, one file for the front’s spot UV elements(like the orange above), one for the back artwork, and one for the back’s spot UV elements (again all elements in the orange like the above)
Looking to order some Spot UV business cards, click here
If you are having issues dont hesitate to give us a call 01708 200166 or email info@essexbanners.com


